All guides
Start here
Customers and billing
Hotspot
Network
- Devices, OLTs and ONUs
- Routers, RADIUS and sessions
- TR-069 and remote ONU setup
- Zones, nodes, topology and the map
Support and messaging
Your team and settings
For your subscribers
Troubleshooting
On this page
How access works#
Everyone on your team gets their own login. Their role decides which menus they see and what they can change. A role is just a named list of permissions.
You manage both in Settings → Users. The page has two tabs: Users (your staff) and Roles (what each job is allowed to do).
Every new ISP starts with these roles. You can use them as they are, change them, or make your own.
| Role | Made for |
|---|---|
| Super Administrator | The owner. Every permission. It's a system role, so nobody can change or delete it. |
| Administrator | Running the business day to day: subscribers, plans, payments, network, tickets and settings. It can't add staff or change roles. |
| Billing Manager | Subscribers, plans, subscriptions and payments, including the money figures. |
| Support Staff | Customer care: subscribers, tickets and sessions. They can see that a payment arrived, but not the amount. |
| Technician | Field work: their own tickets, whether a customer is online, and configuring ONUs and routers. No payment amounts. |
| Viewer | Looking only. Reports and lists, no changes. |
Add a staff member#
Do this for every new person, so the record of who did what stays true.
- Open Settings → Users and stay on the Users tab.
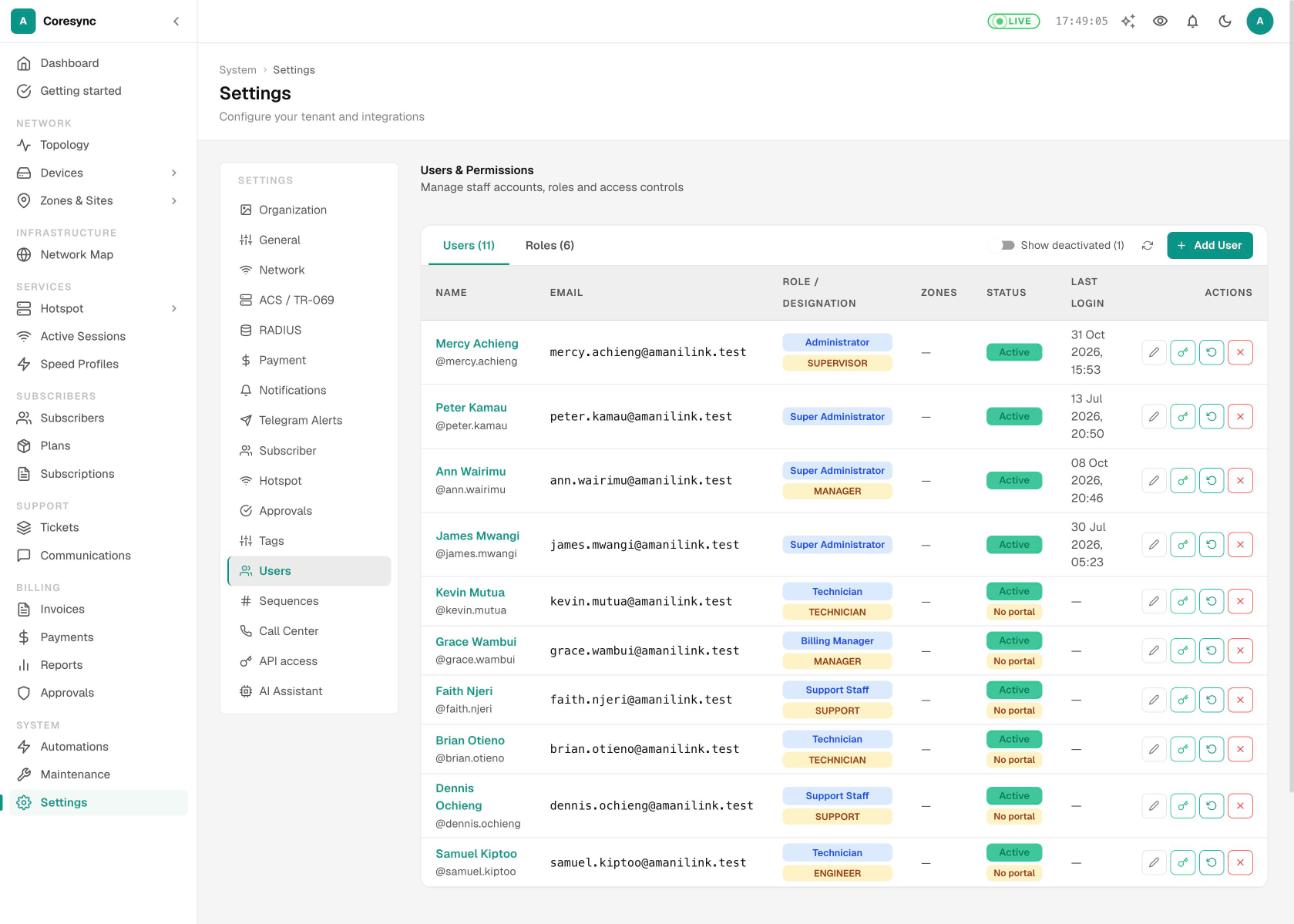
- Press Add User. Type their Full Name, Email and Phone.
- Pick a Role. Then pick a Designation if one fits: Technician, Engineer, Supervisor, Manager or Support.
- Under Zones, pick the areas this person covers.
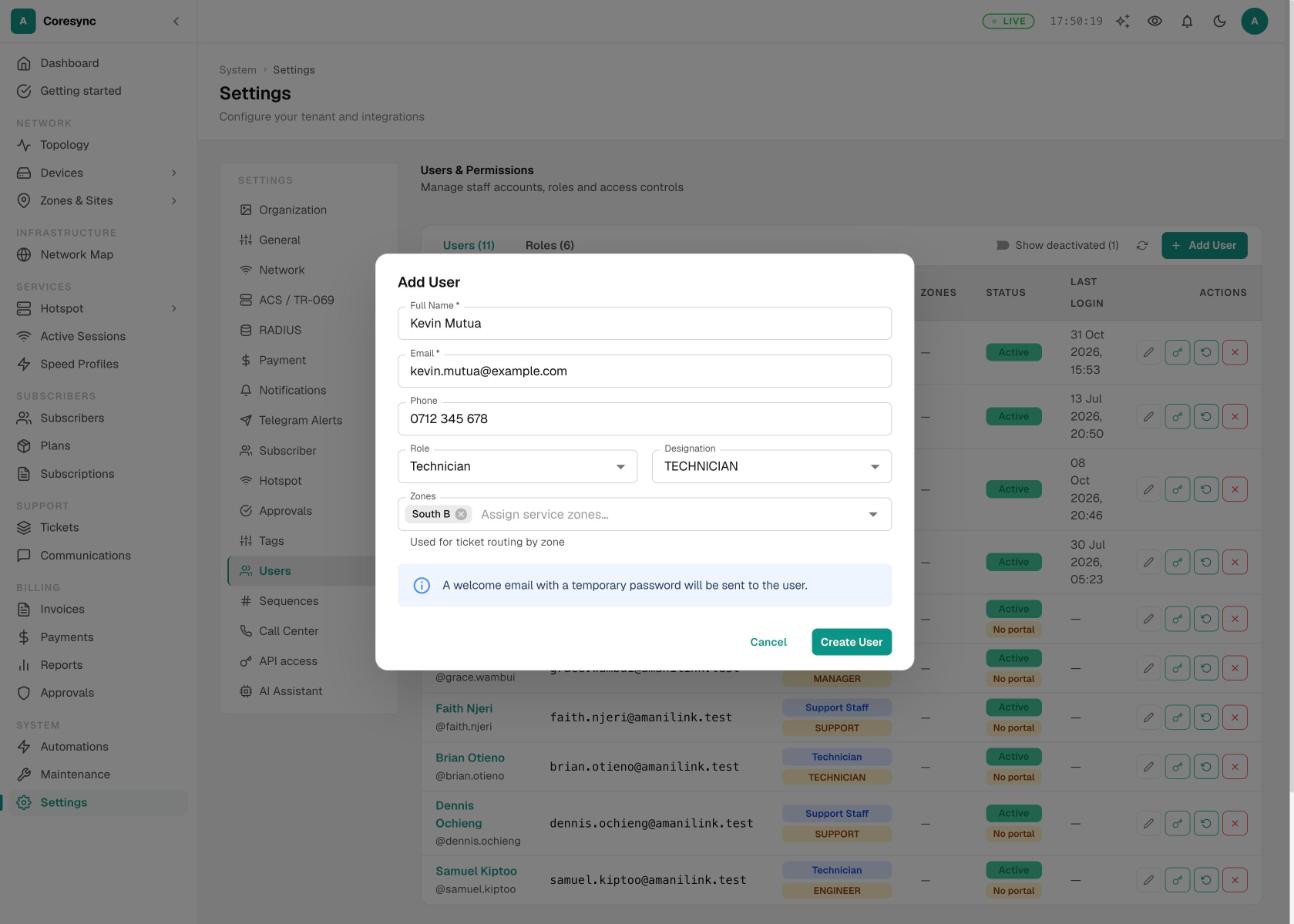
- Press Create User. CoreSync emails them a temporary password and the link to your login page.
| Field | What it changes |
|---|---|
| Phone | Staff with a phone number can be picked when you text a customer's PPPoE login to a technician. Add one for every technician. |
| Designation | Alerts sent “to managers”, from automations and ticket updates, go to staff marked MANAGER or SUPERVISOR, and to anyone whose role name includes “admin”. |
| Zones | Shown on the staff list and on their profile, so everyone knows who covers which area. |
Make a role that fits the job#
Make a role for each job, not for each person. For example: Customer care, Cashier, Field technician, NOC.
- In Settings → Users, open the Roles tab. Each role shows how many permissions it has, and whether it's System or Custom.
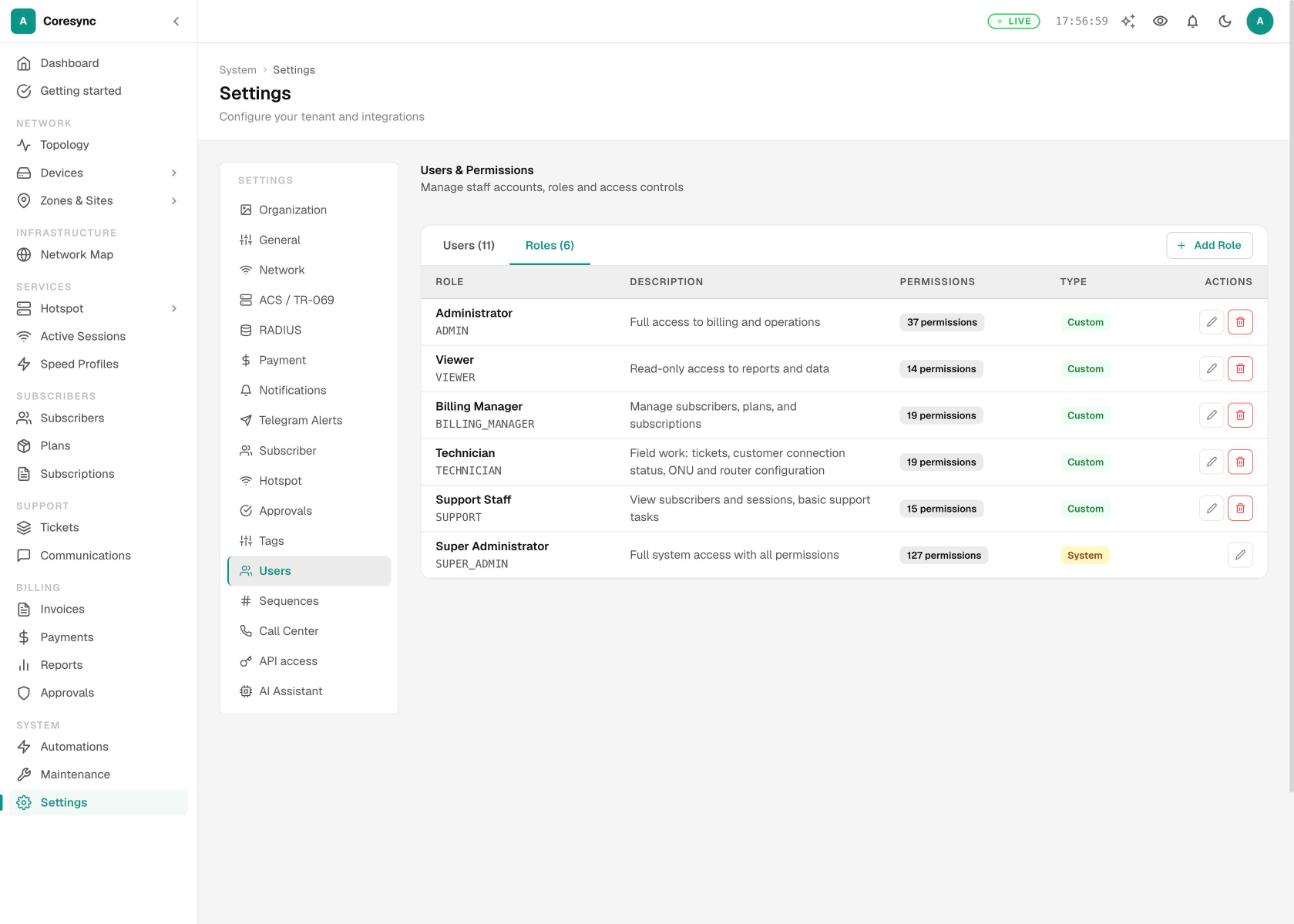
- Press Add Role. Give it a Role Name and a short Description.
- Tick its permissions. They're grouped by area: SYSTEM, BILLING, NETWORK, HELPDESK and so on. The box beside an area ticks everything in it. Open the area to tick single permissions. The counter shows how many you've picked.
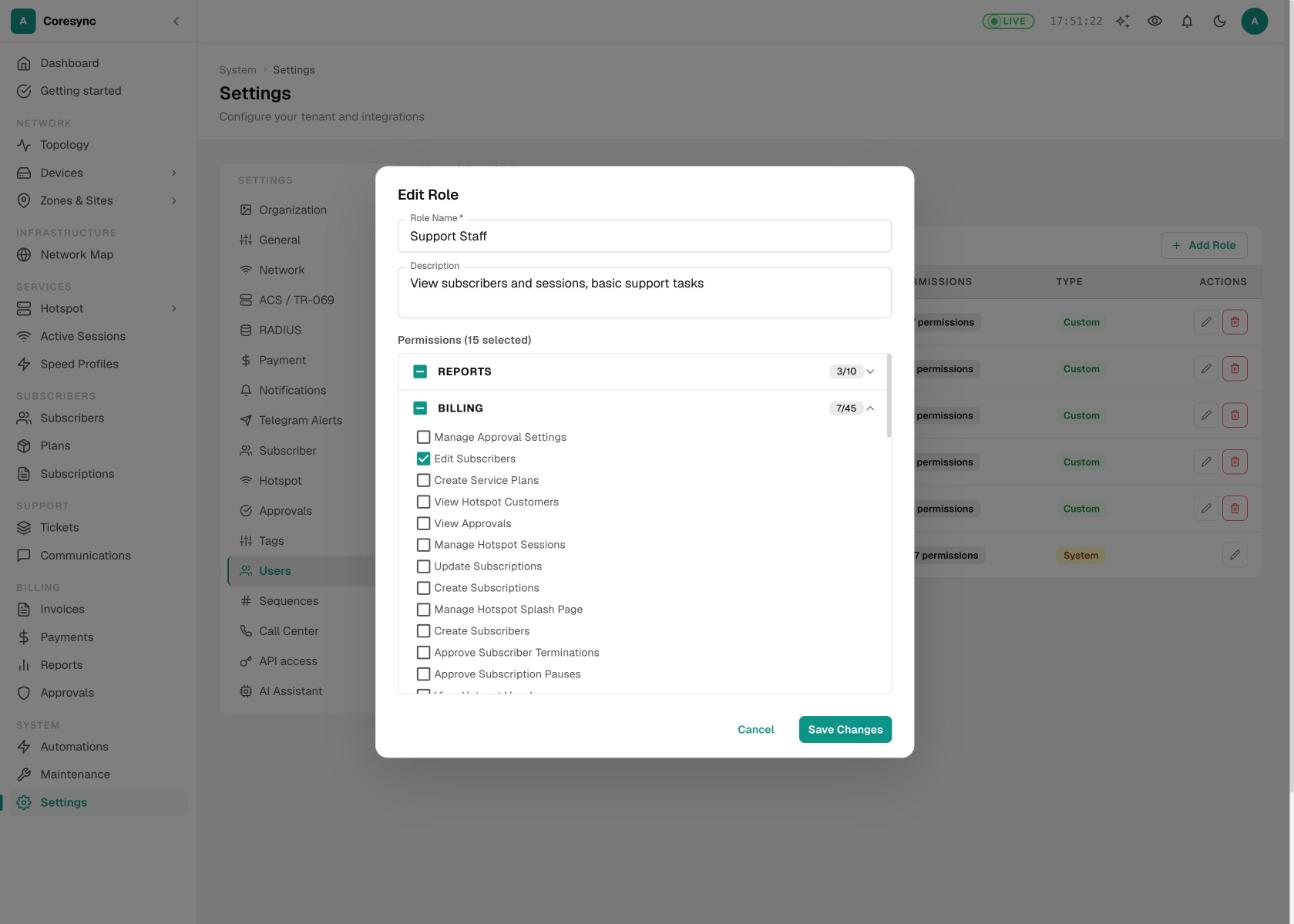
- Press Create Role. Then give it to people in Users, with the pencil button on their row.
To change a role, press the pencil on its row. To delete one, press the bin. You can only delete a role nobody has: move its people to another role first.
Who should see money figures#
Three permissions decide how much of your money a person sees:
| Permission | What it shows |
|---|---|
| View Payments | The Payments page: that a payment arrived, when, and against which account. |
| View Money Figures | The amounts: payment amounts, balances and totals. |
| View Revenue Reports | Revenue totals: the money cards on the dashboard and Payments page, and the Revenue tab in Reports. |
Rule of thumb: owners and finance get all three. Customer care gets View Payments only. That's enough to tell a caller “yes, your payment came in at 9:14” and reconnect them. Technicians don't need any of them.
The default Support Staff and Technician roles already follow this rule.
Who can approve#
You can make some actions wait for a second person: suspending, terminating, pausing, free or pay-later days, outage compensation, matching a payment and moving a payment. You switch each one on in Settings → Approvals. See Approvals for how the inbox works.
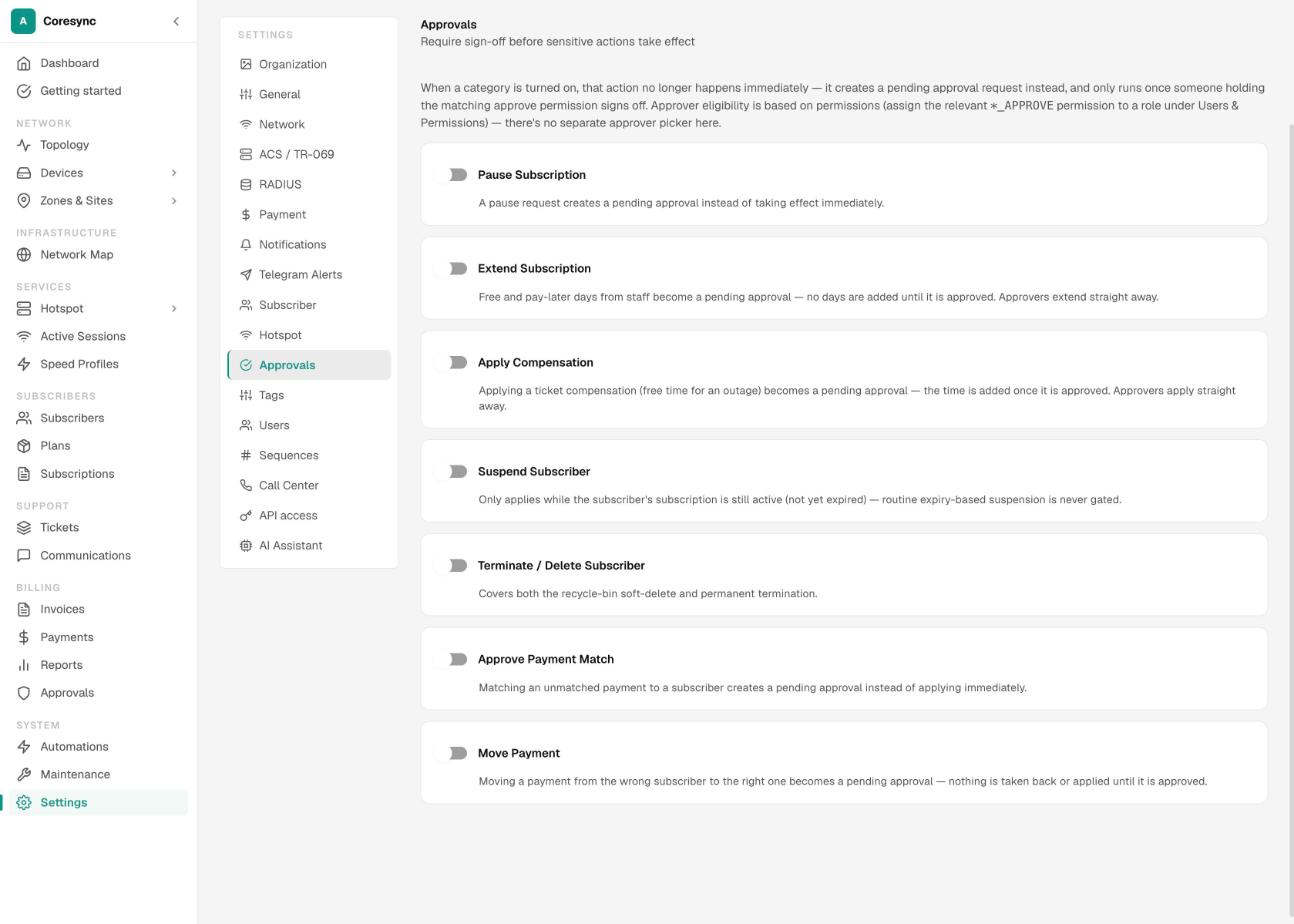
There's no list of approvers to fill in. Whoever holds the matching approve permission can approve:
| To approve | Give this permission |
|---|---|
| Suspensions | Approve Subscriber Suspensions |
| Terminations and deletions | Approve Subscriber Terminations |
| Pauses | Approve Subscription Pauses |
| Free and pay-later days | Approve Subscription Extensions |
| Outage compensation from a ticket | Approve Compensations |
| Matching an unmatched payment | Approve Payment Matches |
| Moving a payment to the right subscriber | Approve Payment Moves |
View Approvals lets someone see the inbox. Manage Approval Settings lets them turn the switches on and off. It's a separate permission on purpose: someone who has to ask for approval can't switch the check off.
A staff member's page#
Click a name in Settings → Users to open their page. It shows who they are, what they're working on, and what they finished.
- Overview: their details, then Workload — right now (open jobs, overdue, due today, awaiting verify, reworked) and Throughput for a date range (resolved, verified and closed, raised, and how long jobs took).
- Work: the tickets behind those numbers. Undone — still open lists their open jobs, overdue first. Completed in range lists what they resolved or verified. Pick Today, 7 days, 30 days, This month or Custom.
- Access: their name, phone, role, designation, zones and switches. Press Save changes when you're done.
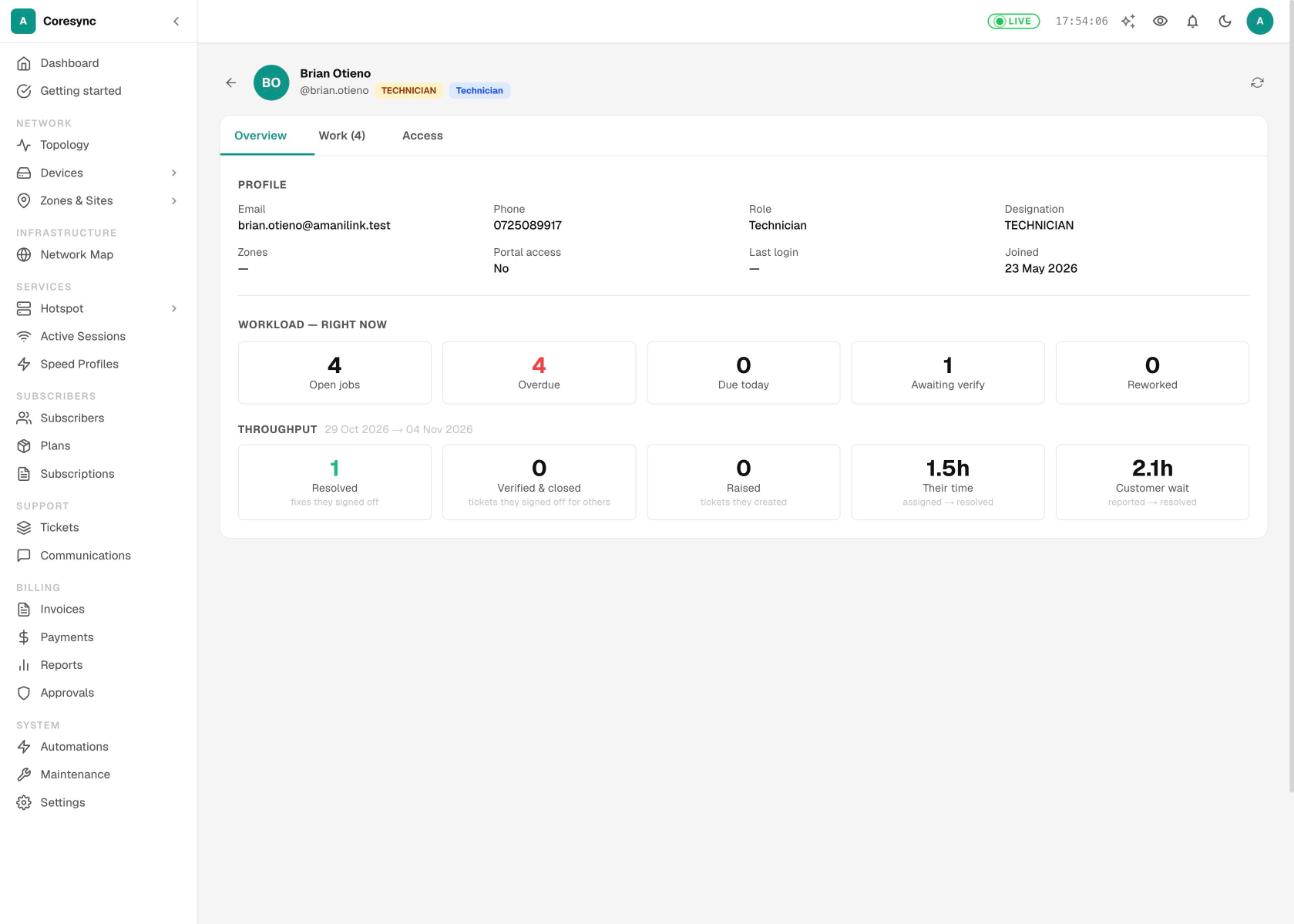
Their time runs from when a job reached them to when they resolved it. Customer wait runs from when the customer reported it. A big gap between them means jobs sat unassigned, not that the technician was slow.
Passwords and ticket-only staff#
- Reset password (the round-arrow button on their row) sets a new password straight away. Share it with them yourself. Use it when someone is locked out.
- Change password (the key button) needs their current password. It's for someone who knows their password and wants a new one.
- Staff can also reset their own password from the login page with Forgot password?.
Turn Portal access off for someone who should only see tickets, such as a contractor. They keep their ticket permissions and lose everything else, whatever their role says. Their row shows No portal.
When someone leaves#
Deactivate them on their last day. Their history stays: everything they did is still recorded against their name.
- Open their page and check the Work tab. Give their open tickets to someone else.
- If they made API keys, revoke them in Settings → API access. See API keys and webhooks.
- If they hold stock, such as ONUs issued to them, return it in Inventory → Stock. See Leads and inventory.
- In Settings → Users, press the red × on their row (Deactivate user). It happens at once, with no second question.
They can't sign in again. Anything they still have open stops working within about half a minute, and so do any API keys they made.
Made a mistake? Turn on Show deactivated above the list and press Restore user on their row.
Common mistakes#
- Making everyone a Super Administrator. Build roles for each job. Most people need far less.
- Sharing one login. Then the record of who suspended or paid what means nothing.
- Giving customer care the money figures. View Payments is enough to confirm a payment.
- Letting the same person ask and approve. Give approve permissions to a supervisor, not to the people who make the requests.
- Deactivating before handing over. Their open tickets stay assigned to them. Reassign first.
- Expecting the Administrator role to manage staff. It can't. Give your office manager a role with Create Users and Edit Users, or keep staff changes with the owner.